3 ways to set up author information in Git
Tips on setting up Git author information for solo and pair programming

Setting up author info is one of the first tasks to do before you can start using Git. Doing it right and carefully can be much value when digging into the project history later on.
The global user
After installing it, you have to set your name and email address in order to use Git. This information will be attached to each commit you make, so without it, you won't be able to create commits.
git config --global user.name "Dr. Henry Jekyll"
git config --global user.email jekyll@example.com
It's important to specify your name and email correctly because it is the only way for developers to find you in case they have any question regarding your changeset.
If you are not sure what your current user.name or user.email is, you can check them with the following command:
git config --listNote that it lists other settings as well, such as aliases and the default push action.
Repository-specific authors
If you have projects that you'd like to contribute as a different author, you can
configure these repositories to use unique user.name and user.email by omitting
the --global flag from the previous commands:
cd my-awesome-repo
git config user.name "Mr. Edward Hyde"
git config user.email hyde@example.com
This can come in handy if you have hobby projects on your work machine.
Git does not support switching between preconfigured authors, so if you need to change the author name or email frequently, I suggest creating an alias or a script for it. (Check this post for some useful tips.)
As with global settings, the repository-specific configurations can also be listed with the
git config --list command. In this case, the user.name and the user.email will be
listed twice: the former occurrence of each setting is the global, while the latter is
the repository-specific value. Git will always use the last values from this list.
Multiple authors for pair programming
Git currently does not support multiple authors for a single commit, but there are several options to overcome this shortcoming.
In this section I'll go through some of them:
- using multiple names in the user.name
- adding trailers to the commit messages
- encoding in the author and committer fields of the commit
1. Using multiple names in the user.name
The easiest solution is to list all the authors in the user.name setting.
git config user.name "Dick Grayson, Bruce Wayne"This can work well, if the pair-programming session lasts for a couple of hours, spanning multiple commits, as it has to be set only once. Just don't forget to revert to your original settings afterward.
2. Adding trailers to the commit messages
Another solution might be to mention the other author in each relevant commit message. As it's mentioned in the Git Wiki's Commit Message Conventions section, Trailers provide a way to include additional information in a header-like, searchable, easy-to-parse format at the end of a commit message.
Consider this example commit message:
Adding XYZ feature.

Co-authored-by: Bruce Wayne <wayne@example.com>
Conveniently, there is a tool to add trailers, called git-interpret-trailers.
Custom commit message templates provide another way to add trailers,
so you don't have to append it every time you commit.
Just create a simple text file, for example, .git-commit-template with
the Co-authored-by trailer described above, then run the following command:
git config commit.template .git-commit-template(Of course, you can set it up globally just like any other git config.)
At the end of the pairing session, the commit template can be reset to the default
with git config --unset commit.template.
Finally, you can augment your commit messages all at once with the necessary co-author information just before pushing with interactive rebasing.
# X is the number of commits to be edited
git rebase -i HEAD~X
Be careful with this though, make sure to only edit unpushed commits, or commits on private branches. As it rewrites Git history, it can cause problems if others are on the affected branch.
3. Encoding in the author and committer fields of the commit
Git store the name and the email of two persons for each commit: the committer and the author. The difference between the two is that the author is the person who wrote the changes, while the committer is the person who uploaded them the repository.
You can list this information with git-log:
git log --format=fuller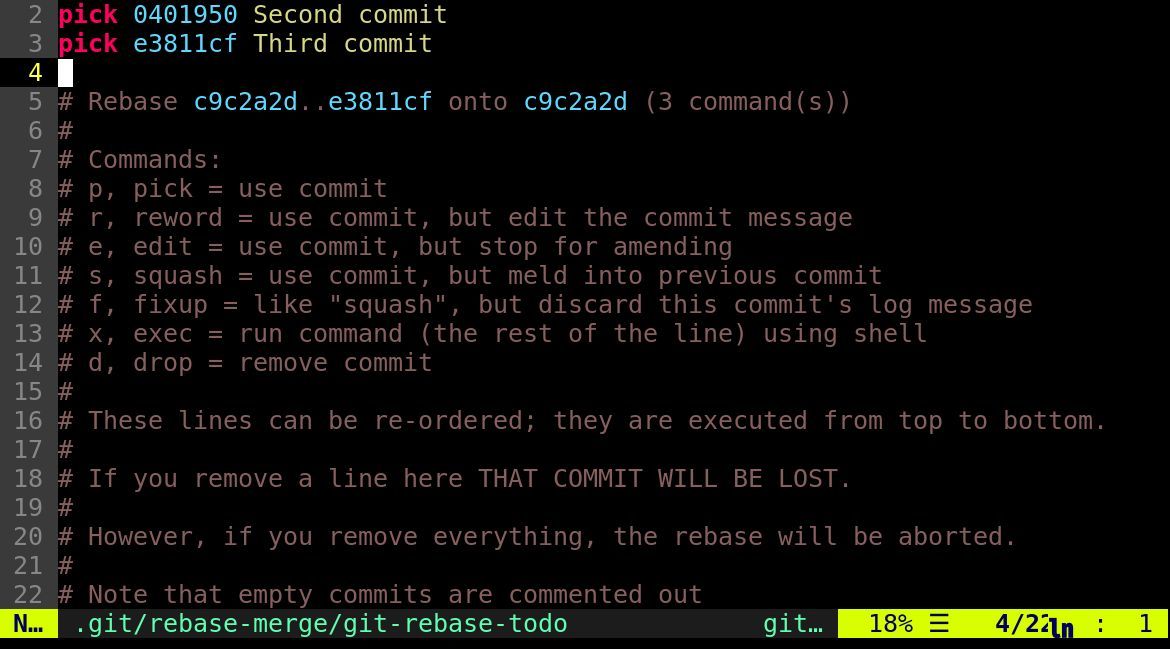
Typically they are the same if you commit your changes by yourself, but this can be a handy tool if somebody sends you a patch via e-mail. You can preserve the identity of the original author while taking credit for the commit:
git commit --author="Bruce Wayne <wayne@example.com>"This infrastructure might be used for pair programming as well as to mark the participants, but I think the other alternatives mentioned in this post are better because most of the tools don't show both the committer and the author by default.
Summary
Git supports various workflows and can be bent to work in most situations. It's worth the time to carefully craft appropriate metadata associated with each commit, as they can provide valuable information later on.