Modern JavaScript library starter
How to publish a package with TypeScript, testing, GitHub Actions, and auto-publish to NPM

Publishing a library
Back then when I wanted to write and publish a JavaScript library, all I had to do is to create a new GitHub project, write a package.json with some basic
details, add an index.js, and publish to NPM via the CLI. But this simple setup misses a lot of new things that are considered essentials: no types, no
CI/CD, no tests, to name a few.
So the last time I needed to start a new JavaScript library I spent some time setting up the basics and then realized that these steps are mostly generic and can be reused across different projects. This article is a documentation of the different aspects needed to develop and publish a modern library.
More specifically, I wanted these features:
- the library is written in TypeScript with types published in the package
- there are tests, also written in TypeScript
- a CI pipeline runs for commits building and running the tests
- a CD pipeline is run for every new version publishing to the NPM registry
Starting code
The important files are some configuration, the package source, and the tests:
src/index.ts
src/index.test.ts
package.json
tsconfig.json
Since there is a compile step, the sources and the compiled files are in different directories. While the .ts files are in src/, the target for the
compilation go to dist/.
The package.json:
{
	// name, version, description, other data
	"main": "dist/index.js",
	"type": "module",
	"files": [
		"dist"
	],
	"devDependencies": {
		"ts-node": "^10.9.2",
		"typescript": "^5.3.3"
	}
}
The files define the dist as only the compiled files will be packaged and pushed to the NPM registry. Then the main: "dist/index.js" defines
the entry point.
The tsconfig.json configures the TypeScript compiler:
{
	"compilerOptions": {
		"noEmitOnError": true,
		"strict": true,
		"sourceMap": true,
		"target": "es6",
		"module": "nodenext",
		"moduleResolution": "nodenext",
		"declaration": true,
		"outDir": "dist"
	},
	"include": [
		"src/**/*.*"
	],
	"exclude": [
		"**/*.test.ts"
	]
}
Depending on the project a lot of different configurations are possible, but the important parts are that the files in the src/ folder is included but not
the tests, and the outDir is dist.
Then the index.ts and the index.test.ts files are simple, just to demonstrate that the library works:
// src/index.ts

export const test = (value: string) => {
	return "Hello " + value;
}
// src/index.test.ts

import test from "node:test";
import { strict as assert } from "node:assert";
import {test as lib} from "./index.js";

test('synchronous passing test', (t) => {
	const result = lib("World");
  assert.strictEqual(result, "Hello World");
});
Notice the import ... from "./index.js" line. While the file has .ts extension, importing is done using the .js.
NPM scripts
Next, configure the scripts in the package.json.
First are the build and clean:
{
	"scripts": {
		"build": "tsc --build",
		"clean": "tsc --build --clean"
	}
}
These simply call the tsc to compile TypeScript to JavaScript:
$ npm run build

> website-validator@0.0.8 build
> tsc --build

$ ls dist
index.d.ts  index.js  index.js.map
Next, the prepare script runs the build when the package is being published. This is a special name as npm calls it at different parts of the
lifecycle:
{
	"scripts": {
		"prepare": "npm run clean && npm run build"
	}
}
Tests
Next, configure automated tests. For this, I found that it's easier to not compile the test code but use a library that auto-complies TS files when needed. This
is where the ts-node dependency comes into play.
Because of this, the test script does not need to run the build:
{
	"scripts": {
		"test": "node --test --loader ts-node/esm src/**/*.test.ts"
	}
}
The --loader ts-node/esm attaches the ts-node to the node module resolution process and that compiles .ts files whenever they are imported.
This makes testing setup super easy: no compilation, just running.
$ npm test

> website-validator@0.0.8 test
> node --test --loader ts-node/esm src/**/*.test.ts

(node:245543) ExperimentalWarning: `--experimental-loader` may be removed in the future; instead use `register()`:
--import 'data:text/javascript,import { register } from "node:module"; import { pathToFileURL } from "node:url"; register("ts-node/esm", pathToFileURL("./"));'
(Use `node --trace-warnings ...` to show where the warning was created)
✔ synchronous passing test (1.01411ms)
ℹ tests 1
ℹ suites 0
ℹ pass 1
ℹ fail 0
ℹ cancelled 0
ℹ skipped 0
ℹ todo 0
ℹ duration_ms 2650.590767
Continuous integration
Now that we have all the scripts in place for the library, it's time to setup GitHub Actions to run the build and the tests for every push.
Actions are configured in the .github/workflows directory, where each YAML file describes a workflow.
# .github/workflows/node.js.yml
name: Node.js CI

on:
  push:
  pull_request:

jobs:
  build:
    runs-on: ubuntu-latest

    strategy:
      matrix:
        node-version: [21.x]

    steps:
    - uses: actions/checkout@v4
    - name: Use Node.js ${{ matrix.node-version }}
      uses: actions/setup-node@v3
      with:
        node-version: ${{ matrix.node-version }}
        cache: 'npm'
    - run: npm ci
    - run: npm run build --if-present
    - run: npm test
Let's break down the interesting parts in this workflow!
The on: push, pull_requests defines that the job will run on every push and pull request. You can define some filters here, such as to run tests only for
certain branches, but it's not needed for now.
The build job uses ubuntu-latest which is a good all-around base for running scripts as it has a lot of preinstalled
software.
The strategy/matrix defines which node-version to run the build with. This works like templating: the ${matrix.node-version} placeholder will
be filled with each value in this array and each configuration will bu run during the build.
The steps are simple: checkout gets the current code, the setup-node installs the specific NodeJS version, then it runs npm ci, npm run build, and npm test.
In action
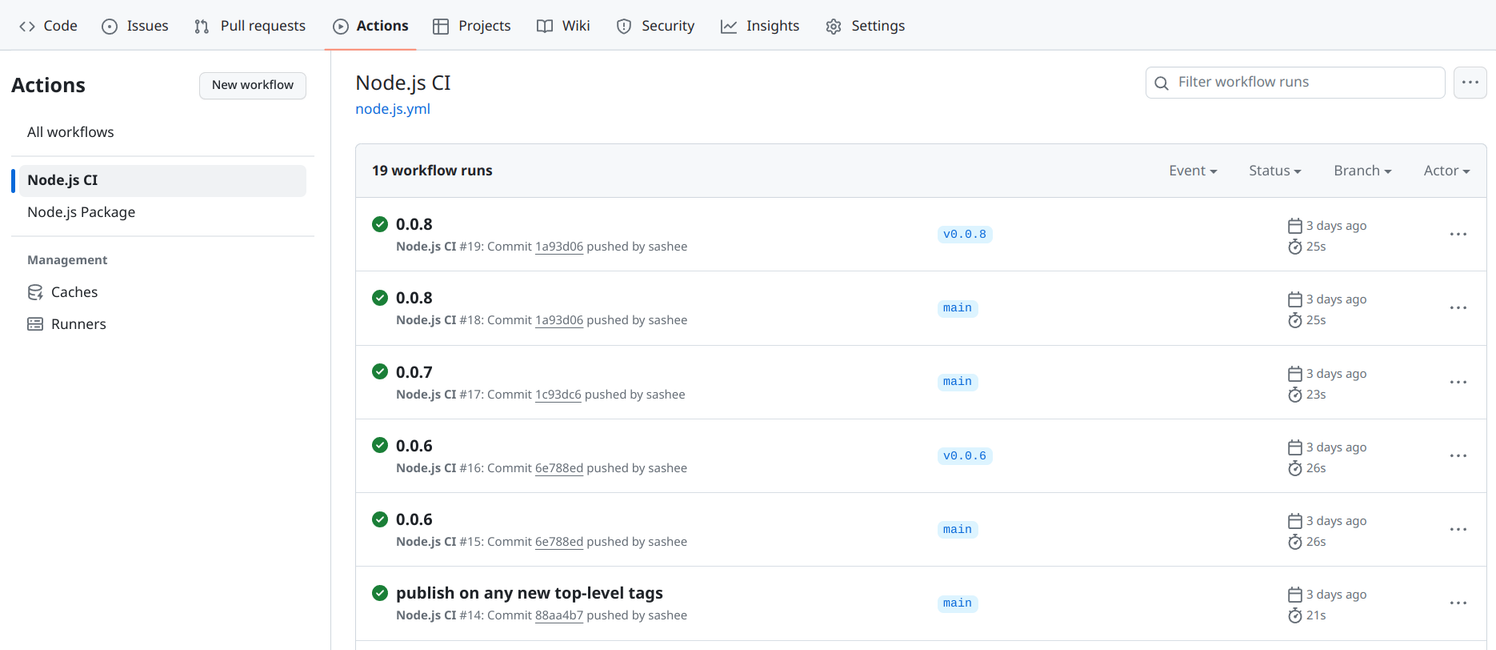
The GitHub Actions page shows that the workflow runs for every push:
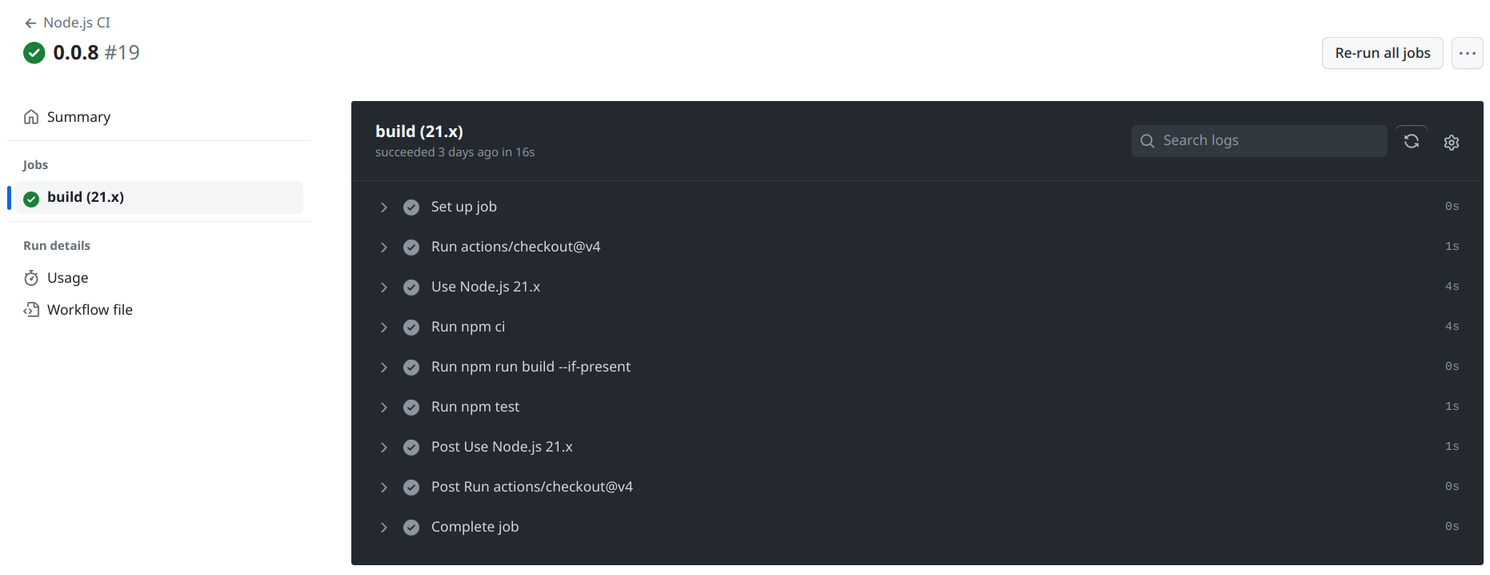
And each change shows the steps with the logs:
Moreover, a green checkmark shows that the actions were run successfully for a given commit:
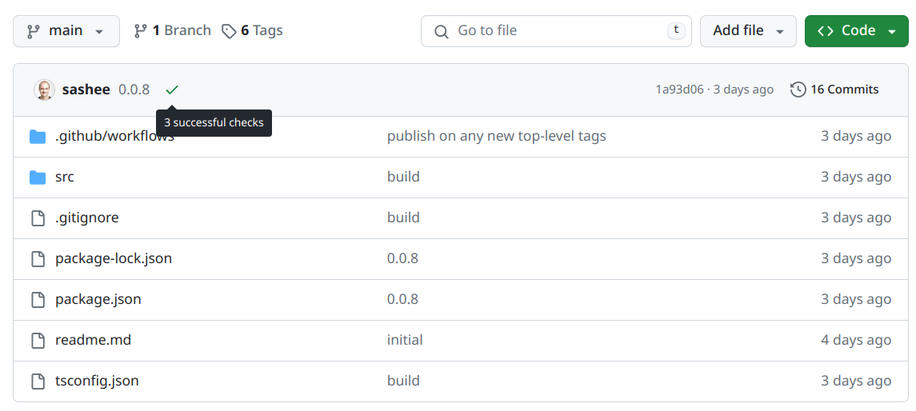
This makes it very easy to see if tests are failing
Auto-deploy to NPM
Let's then implement the other half of CI/CD: automatic deployment!
For this, we'll configure a separate workflow:
# .github/workflows/npm-publish.yml
name: Node.js Package

on:
  push:
    tags:
      - "*"

permissions:
  id-token: write

jobs:
  build:
    # same as the other build

  publish-npm:
    needs: build
    runs-on: ubuntu-latest
    steps:
      - uses: actions/checkout@v4
      - uses: actions/setup-node@v3
        with:
          node-version: 20
          registry-url: https://registry.npmjs.org/
      - run: npm ci
      - run: npm publish --provenance
        env:
          NODE_AUTH_TOKEN: ${{secrets.npm_token}}
The on/push/tags: ["*"] defines that the workflow will be run for all top-level tags, such as 1.0.0, v5.3.2, but not for feature/ticket
or fix/bug-45. This is a good default config: it does not force any versioning strategy but also allows any type of hierarchical branch names.
The build step is the same as the other action, just to make sure that the library can be built with all the supported NodeJS versions and tests are
passing.
The publish-npm is the more interesting part: it checks out the code, sets up the correct NodeJS version, runs npm ci, the publishes the package.
The --provenance adds extra metadata to the package and that is the reason for the permissions/id-token: write config.
Provenance
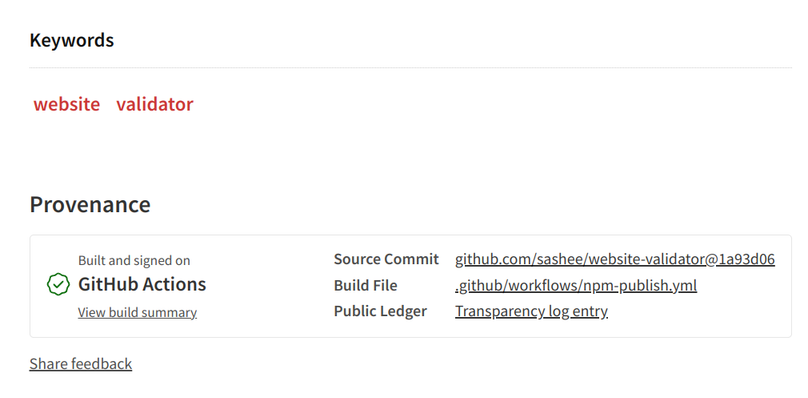
Provenance is a modern feature of the NPM registry and its purpose is to provide a verifiable link from the published package to the source code that produced it.
Without it, nothing says that the code you see on GitHub is the same that the maintainer had when they built and published the package. And that means that even if you go the extra mile to audit the source code of the package it can still happen that it was changed.
Provenance solves this problem: GitHub Actions adds the metadata pointing to the code and the workflow then signs the package. With it, it is no longer possible that a malicious maintainer changes the code before publishing it.
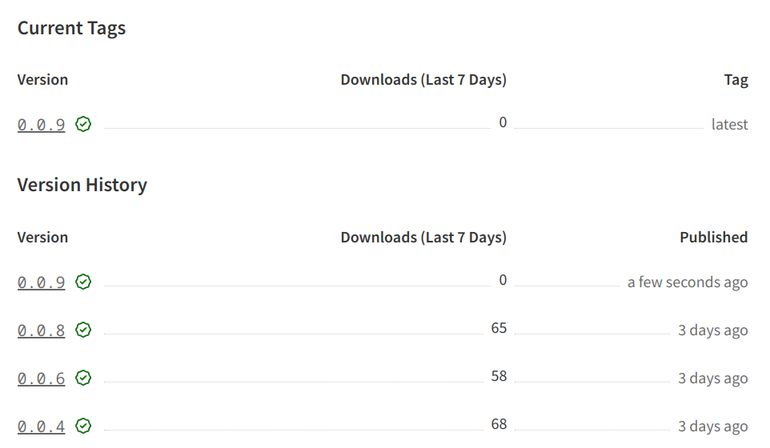
When a version is published with provenance, it is shown on the package's page:
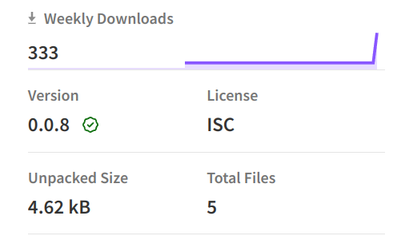
And also there is a green checkmark next to the version:
Secrets
An important link is still missing: how does NPM know that a package can be published from that GitHub Action? This is where the access tokens come into play.
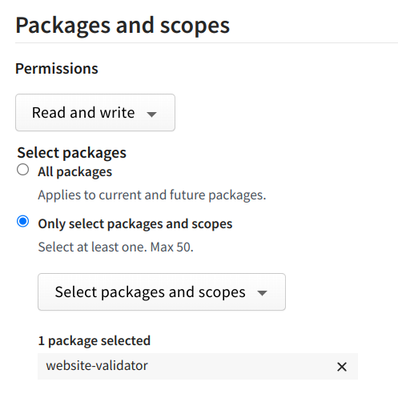
NPM allows creating M2M (Machine-to-Machine) tokens that grant access to publish new versions. So to configure a workflow with publish access, configure a granular access token:

When adding a token, you can define which packages it has access to:
On the other end, add a repository secret to the GitHub repo:
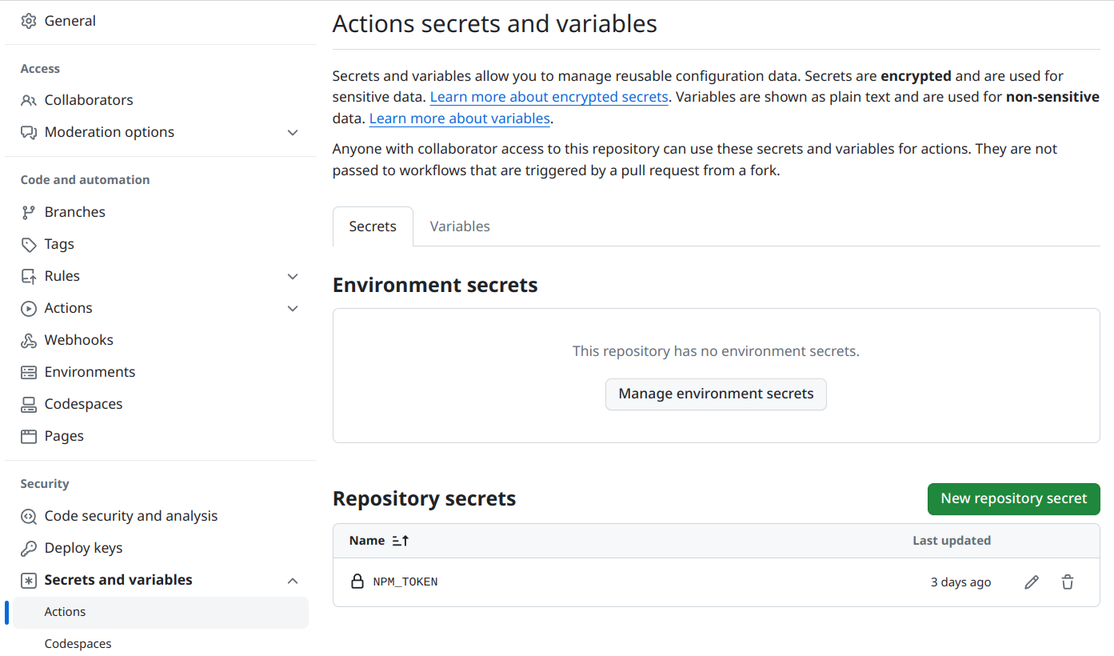
Then the workflow can use this secret:
# .github/workflows/npm-publish.yml

jobs:
  publish-npm:
    steps:
      # ...
      - run: npm publish --provenance
        env:
          NODE_AUTH_TOKEN: ${{secrets.npm_token}}
Publishing a new version
When everything is configured, publishing a new version is simple:
$ npm version patch
v0.0.9
Then push the code and the new tag:
$ git push
$ git push --tags
This triggers the workflows:

And the new version is pushed to the NPM registry:
