React basics
Getting started with the React framework

React
You should give React a try - in case you didn't already. Despite my initial skepticism, it is developer friendly and straightforward. Coming from Angular, it's like programming in a lower abstraction level; but the libraries for common problems, along with less unpleasant surprises make up for this. Componentization and the virtual DOM are React's central concepts. Componentization is the general direction in most contemporary technologies too, like Web Components and Angular Directives. The latter makes the render and the event cycles two distinct flow, making reasoning about the code easier.
This post covers most of the building blocks of a basic Tic Tac Toe game. It utilizes the most recent React version along with some useful libraries. In the end, you should have a good general understanding of the technology.

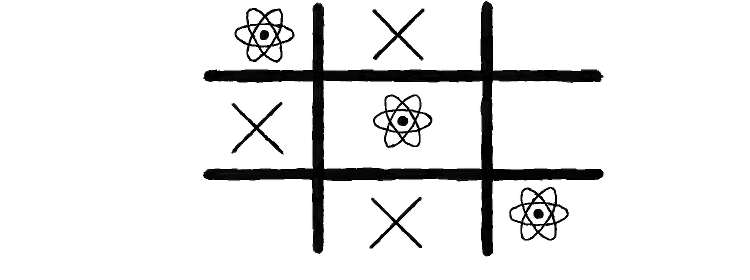
Live demo
As seeing the big picture is one of the most important task, here is a live, clickable demo of what we are building. Have fun!
Build environment
First things first, we need a build environment. Grunt is my go-to choice on front-end building. You'll only need npm and grunt installed to use. A build is needed because React utilizes JSX; it must be transpiled to plain JS for the browser to use. Theoretically you can write Javascript by hand, but you don't want to; JSX makes the syntax much more friendly. Also Babel comes with support to all sorts of goodies from ES6 and beyond as an added bonus; it is safe to use tomorrow's features like arrow functions and consts.
Declaring a dependency on Babel along with it's two presets we'll be using is the first thing to do.
"dependencies": {
	...

	"grunt-babel":"6.0.0",
	"babel-preset-es2015":"6.1.18",
	"babel-preset-react":"6.1.18"
}
We then need to modify the Gruntfile so that it includes Babel.
...
grunt.initConfig({
	babel: {
		options: {
			sourceMap: true,
			presets: ["es2015", "react"]
		},
		dist: {
			files: [
				{ expand: true, src: ['**/*.jsx','**/*.js'], cwd: 'src', dest: "dist", ext: '.js'}
			]
		}
	},

...
});

grunt.registerTask('default', ['clean:dist', 'copy:dist', 'babel:dist']);
For the full Gruntfile, please refer to GitHub. This defines a grunt dev task that watches the src directory and auto-compiles to dist.
Components
Defining the components and their possible states are the first and most important part when developing a React app. React components are like Directives in the Angular world. They are HTML-like elements that encapsulate state inside, can have some attributes (called props in React), and are the main building blocks of more complex components.
When thinking in React, you should visualize that props will go downwards and events upwards. The state should be declared in the topmost component that would need it, as a rule of thumb. For example, all the components need to know whether a game is started; however the actual board is only the needed by the Game.
We'll have three components for this application:
- Header, responsible for the textual information and the Start game button.
- Game, the main part, containing the board
- TicTacToe, the main entry point and container of the other two
These are the components and the states:
TicTacToe:
- gameStarted: True if the game is started
- crossTurn: True if X is the current player
- winner: "X", "O", or undefined to indicate the winner
Header, without any state
Game:
- table: The current table in a 3x3 matrix
- highlighted: The hovered coordinate in array format
TicTacToe
(The complete source can be found here)
React.createClass, along with the configuration, defines a component. A render() method is required at a minimum. (Side note: ES6 classes can be used, but they come with some drawbacks. It is safer to use createClass for now)
The render function defines how the component will look when added to the page. It utilizes JSX; you can write some fancy logic inside; we'll cover it later. You are free to define other arbitrary functions; they can be called and passed as props.
getInitialState() is a special function that initializes the this.state variable. Defaults should be put there. Use this.setState() to modify the state, which does a shallow merge of the current state and the object passed.
Other methods we'll need:
- startGame(): Sets the state to reflect that the game is started
- placed(): Called when the current player placed a mark
- endGame(): Called once the game is ended
This is a simple component; it's main purpose is to bootstrap and wire in the other two.
Header
This is another simple component (source here); it just shows some static text and, conditionally, a button. Conditional rendering can be done in several ways in JSX; a simple guard might very well be the simplest:
{!this.props.gameStarted && <button
		className="btn btn-primary"
		onClick = {this.props.startGame}
	>Start a new game</button>
}
Classes can be added using classNames in JSX. Attaching event handlers is just passing a function to the handler; the onClick attribute in this case. When clicked, React will call the function with a SyntheticEvent. Passed-in functions are simple to call, as they are in the this.props variable.
PropTypes are React's way for defining an interface and types for a component. You can specify what props you expect for the component, which are required, and what are their types. The Header is using these:
propTypes: {
	gameStarted: React.PropTypes.bool.isRequired,
	crossTurn: React.PropTypes.bool,
	startGame: React.PropTypes.func.isRequired,
	winner: React.PropTypes.string
},
If the types passed in does not conform to the ones specified here, you'll see a runtime error in the browser console when running the application. Without static types, an erroneous configuration might slip through unnoticed, but it is a great help anyway.
Defining PropTypes is optional, but highly recommended. It help catch errors in an earlier stage; also adds an easy overview how to use the component.
Game
This is where all the magic happens (code here). It has a nontrivial render(), along with a few caveats.
The primary concept when writing a render() method is that it is for a particular state and props. Dynamics are nothing to worry about at this stage. On the other hand, events are to modify the state. When you handle the events, you don't need to worry about how it would manifest as HTML. This separation greatly simplifies coding with React.
In a nutshell, the render will be called for each state change, then it's result is compared to the virtual DOM; only the difference will be actually modified. Since Javascript is fast but DOM manipulation is not, these rerenders will be short. A pitfall is the premature optimization of the components for lighter renders; don't do this. Shrinking a 1ms full run to a half would only result in less readable code. Don't do it until you have good reasons to.
Mutating this.state directly without using this.setState() is another pitfall. This is plain wrong, as it does not guarantee a rerender. Make sure you don't modify objects and arrays in the state, as it would also have strange and hard-to-debug effects. To this, along with an emptyBoard(), there is also a getModifiedBoard() that returns a new array. Freezing the objects/arrays right before adding them to the state is also a best practice.
Multiple elements
Making an arbitrary amount of elements in JSX in another interesting topic. Luckily, despite it's apparent looks, it is more Javascript than HTML. We can transform an array to elements easily then.
{this.state.table.map((row, rowIndex) => {
	return (

		...

	);
})}
Nesting two of these maps draws the board. Babel takes care of browser compatibility; maps and similar ES6 constructs can be used freely.
Component events
Components have lifecycle events when the props and/or the state is changed. We can use componentWillReceiveProps to listen for props modifications, and componentDidUpdate for both state and props changes. The former should be used when we intent to use setState, as using it in the latter could result in an infinite loop.
ComponentWillReceiveProps is called with the next props; these values can be compared with those in this.props. In this example, an empty board is generated when a game is started.
componentWillReceiveProps(nextProps) {
	if (nextProps.gameStarted && !this.props.gameStarted) {
		this.setState({table: this.emptyBoard()});
	}
},
componentDidUpdate gets both the previous props and the previous state. The game ending is detected here. If one of the players is winning, then we bubble this to the main component. We also detect a draw, as if no players won, but the board is full.
Hovering
Hovering can be done using the onMouseOver and onMouseLeave events. bind() can be used to set parameters to the event handling function.
onMouseOver={this.highlightMove.bind(null, rowIndex, cellIndex)}
onMouseLeave={this.highlightMove.bind(null, undefined, undefined)}
The highlightMove will then get the rowIndex and the cellIndex parameters:
highlightMove(rowIndex, cellIndex) {
	this.setState({highlighted: [undefined, undefined]});
	if (rowIndex !== undefined && cellIndex !== undefined && this.isValidMove(rowIndex, cellIndex)) {
		this.setState({highlighted: [rowIndex, cellIndex]});
	}
},
setState can be called multiple times, it does not affect performance. React collects all such calls and only set the state after the handler is done.
A conditional class is the final piece we need for the hovering effect. Using string concatenations and ternary operators works fine for manipulating the classNames attribute , but it quickly gets tedious. Use the classnames library instead.
className={classNames({highlighted: cell !== "X"})}Tips
Closing remarks, a few tips you'll find useful when working with React:
- Use the React devtools for development. It is a browser plugin that provides all sorts of helpful functions.
- Don't optimize the render cycles in the expense of code readability, unless it is slow. Measuring it does not count as slow. Feeling it is. Also make sure to check it without the devtools open; it makes a big impact on performance.
- Make sure you don't accidentally modify the objects and arrays inside this.state. You can even freeze them to make sure they are immutable.
- Make sure to remove temporary values from the state once they are not needed. For example, the highlighted value needs to be reset when the player places a mark. Failing to do so may result in hard-to-spot bugs.
- Define the propTypes for all your components. It will help to make sure all important props are present and in the right format.
- Use a React-specific linter, like eslint-plugin-react. It catches most of the potential problems before they manifest themselves as bugs.