Accessing Google Drive in Javascript
This how-to provides a step-by-step guide how to access and store files in Google Drive from Javascript

Motivation
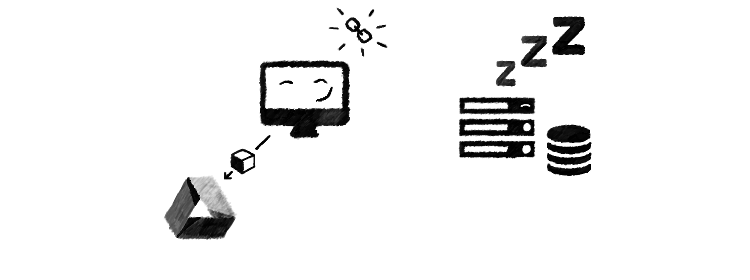
Google Drive gives a convenient and free way to store files in the users' cloud accounts. It can be used for private files as well as publicly available ones. As an application developer, it gives a major easement as it removes the burden of scaling the backend to support larger binaries (like images). On the other hand, Google imposes some usage limits, so keep it in mind when you choose to rely on it.
For this tutorial, I'm continuing the previous tutorial, so I assume that the gapi and Google auth is already set up. There is two things needed to set up:
- The Drive API must be enabled in the Google Developers Console
- The following scope must be requested during the auth process:
https://www.googleapis.com/auth/drive.file
Storing and sharing files using Drive
The objective of this tutorial is to have a service with a method that takes a file and returns a promise which resolves with the publicly accessible link. In practice, it would be used like this:
driveService.insertFile(file, file.name).then(function(link){
    // Do something with the link
});
The basic building blocks are the following:
- Ensure the user is authenticated to Google
- Create a folder to store our files (though it is optional, it should be a best practice not litter our users' main folder)
- Insert the file to the folder
- Allows access to everybody with the link
The first step is already covered in the previous article, so it is a simple gapiAuthService.login().
Creating an upload folder
For the second step, we need to create a new directory in Drive. Folders are just special files with mime type set to application/vnd.google-apps.folder. This effectively makes creating a directory a one-step process:
function createFolder(){
    return gapi.client.drive.files.insert(
        {
            'resource':{
                "title":'Drive API From JS Sample',
                "mimeType": "application/vnd.google-apps.folder"
            }
        }
    )
}
This returns a promise with the result. One thing we should do is to first check if the folder is present, and only create it if it is not. This is a simple listing with filters to the directory mime type and not trashed, then check if there is a result.
function ensureUploadFolderPresent(){
    return gapi.client.drive.files.list(
        {q:"mimeType = 'application/vnd.google-apps.folder' and trashed = false"}
    ).then(function(files){
        var directory=files.result.items;

        if(!directory.length){
            return createFolder().then(function(res){
                return res.result;
            });
        }else{
            return directory[0];
        }
    });
}
This will return a promise with the upload directory, creating it if needed.
Uploading the file
This part is a bit longer, as we need to construct a multipart POST request as per the sample code. Basically we need to read the file data, construct the metadata, construct the multipart POST, make the request, and wrap it all into a deferred, so that we get the promise with the inserted file in the end.
function insertFile(fileData, filename,parentId) {
    var deferred = $q.defer();

    var boundary = '-------314159265358979323846';
    var delimiter = "\r\n--" + boundary + "\r\n";
    var close_delim = "\r\n--" + boundary + "--";

    var reader = new FileReader();
    reader.readAsBinaryString(fileData);
    reader.onload = function (e) {
        var contentType = fileData.type || 'application/octet-stream';
        var metadata = {
            'title': filename,
            'mimeType': contentType,
            "parents": [{"id":parentId}]
        };

        var base64Data = btoa(reader.result);
        var multipartRequestBody =
            delimiter +
            'Content-Type: application/json\r\n\r\n' +
            JSON.stringify(metadata) +
            delimiter +
            'Content-Type: ' + contentType + '\r\n' +
            'Content-Transfer-Encoding: base64\r\n' +
            '\r\n' +
            base64Data +
            close_delim;

        var request = gapi.client.request({
            'path': '/upload/drive/v2/files',
            'method': 'POST',
            'params': {'uploadType': 'multipart'},
            'headers': {
                'Content-Type': 'multipart/mixed; boundary="' + boundary + '"'
            },
            'body': multipartRequestBody});
        request.then(function(file){
            deferred.resolve(file.result);
        },function(reason){
            deferred.reject(reason);
        });
    };

    return deferred.promise;
}
The next thing is that we need to check if the file is inserted or not. In a few occurrences I experienced some delays between the insertion and the availability, so it's best to make sure it's ready before we pass it back. The checking part is to get the file, and if it's successful, then we know it's ready, otherwise we wait a little and check again.
function waitForFileToBecomeActive(fileId){
    var deferred = $q.defer();

    gapi.client.request({
        'path': '/drive/v2/files/'+fileId,
        'method': 'GET'
    }).then(function(){
        deferred.resolve();
    },function(){
        setTimeout(function(){
            waitForFileToBecomeActive(fileId).then(function(){
                deferred.resolve();
            },function(reason){
                deferred.reject(reason);
            })
        },1000);
    });

    return deferred.promise;
}
Inserting a permission
The last part is to insert a permission for the newly uploaded file so that everyone with the link can view it. It is a simple insert permission operation, nothing special.
function insertPermission(file){
    return gapi.client.drive.permissions.insert({
        'fileId': file.id,
        'resource': {
            "withLink": true,
            "role": "reader",
            "type": "anyone"
        }
    })
}
It returns a promise that will be resolved when the permission is successfully inserted.
Wrapping it all together
Now we have all the basic building blocks we need to insert a file, we just need to invoke them in the right order. The very last part is to return the link to the file, and it's available via the webContentLink field.
insertFile: function (fileData, filename) {
    return gapiAuthService.login()
        .then(function(){
            return ensureUploadFolderPresent();
        }).then(function(directory){
            return insertFile(fileData,filename,directory.id);
        }).then(function(file){
            return waitForFileToBecomeActive(file.id).then(function(){
                return insertPermission(file).then(function(){
                    return file.webContentLink;
                });
            });
        });
}
Conclusion
In this tutorial we've covered most of the basic building blocks of using the Drive API. While keeping the limitations in mind it is a viable alternative to file storages. It's API needs some time to getting used to, but after a bit of groundwork to hide the details behind a service, it can be made easy-to-use. Also there are many more functionality not covered in this tutorial, you can always refer to the documentation.


